How to Use JIBAO Proxy on Android Devices
I. Preparación #
Antes de comenzar, asegúrese de haber completado los siguientes pasos:
- Una cuenta registrada e iniciada sesión en JIBAO Proxy account
- Saldo disponible en la cuenta (Los nuevos usuarios pueden usar el crédito de prueba gratuito de 500MB)
- An Android device with a stable internet connection
- A third-party proxy application installed on your device
Recommended apps (choose one):
- V2Ray / V2RayNG
- Shadowrocket (available on some Android devices)
- Clash for Android
⚠️ Nota: The above applications are third-party tools. Please download and install them separately.
II. Obtener detalles del proxy #
- Log in to the JIBAO Proxy official website
- Ingrese al panel de usuario y seleccione el producto proxy que desea usar
- Recommended for beginners: Overseas IP residencial dinámica
- After generating the proxy, you will receive the following details:
- Dirección del servidor (Host / IP)
- Puerto
- Nombre de usuario
- Contraseña
- Protocol type (HTTP / HTTPS / SOCKS5)
Please save this information, as it will be required during configuration.
III. Configure Proxy Using V2RayNG (Example) #
The following example uses V2RayNG, which is suitable for most Android users.
1️⃣ Add a Proxy Node #
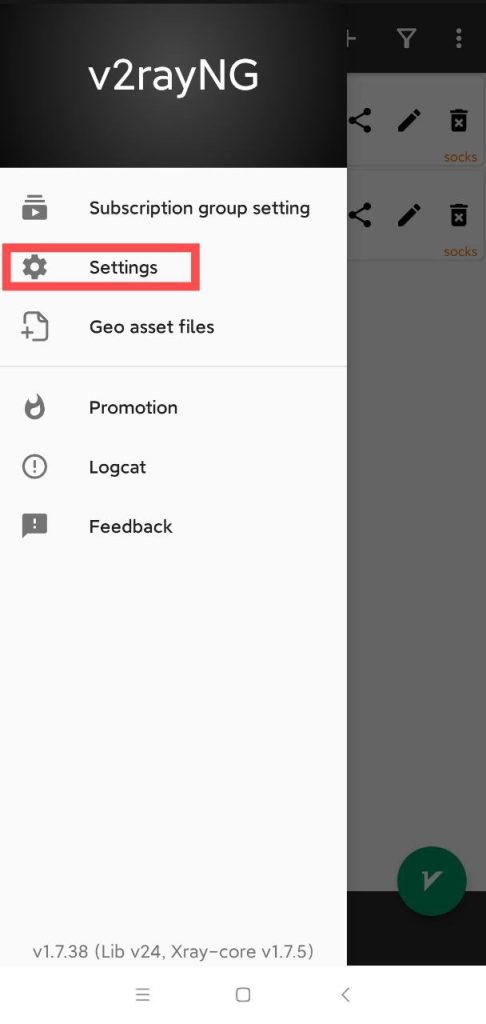
- Open V2RayNG and tap “Configuración” to enter the settings page
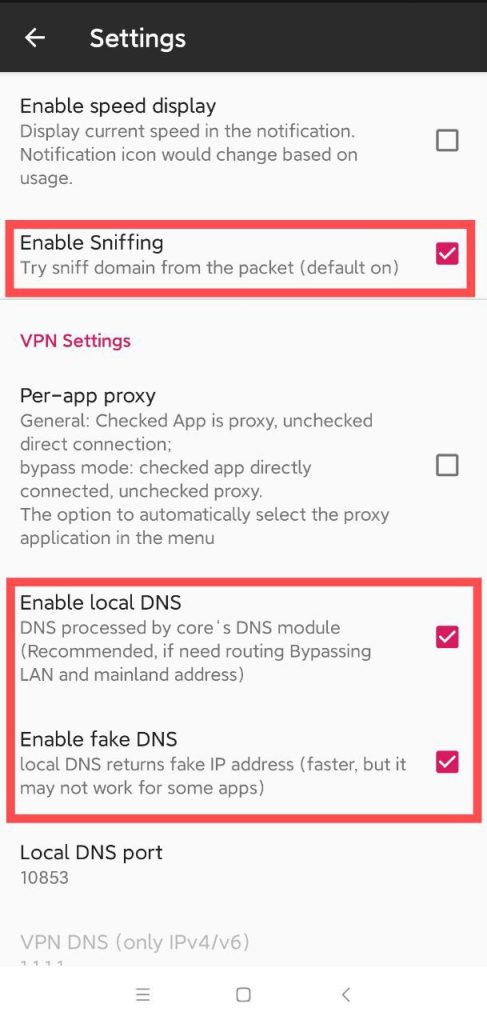
2.Enable the following options:
- Enable traffic sniffing
- Enable local DNS
- Enable virtual DNS (Leave all other settings as default)
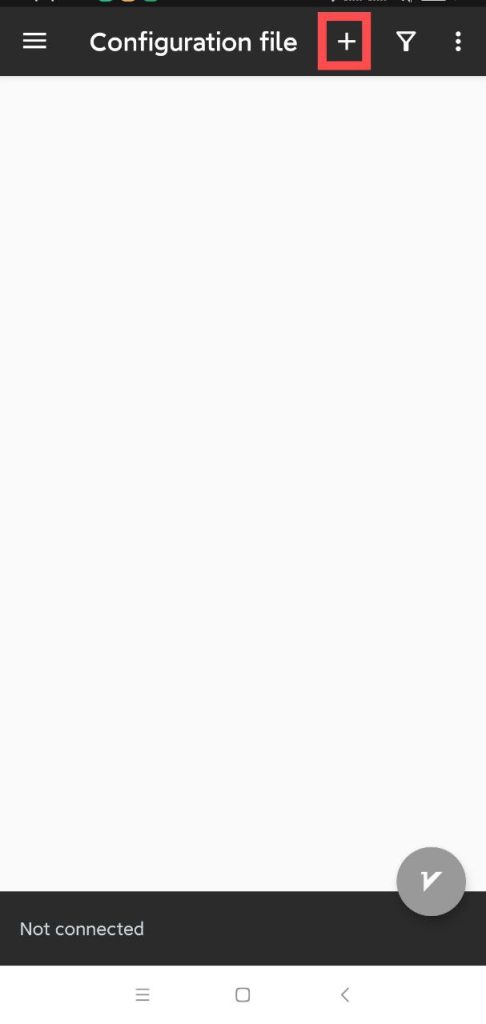
3.Toque the “+” icon in the bottom-right corner to add a configuration
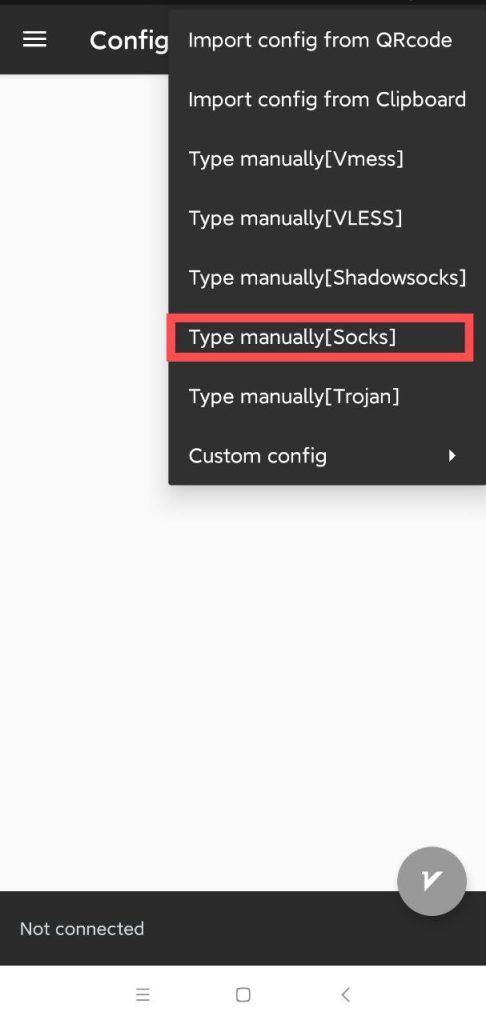
4.Select Manual Input [SOCKS]
2️⃣ Enter Proxy Information #
Fill in the following fields:
- Server: Proxy IP address or domain
- Puerto: Corresponding port
- Nombre de usuario: Provided in the dashboard
- Contraseña: Provided in the dashboard

After completing the fields, tap the “✓” icon to save the proxy.
IV. Activar proxy y probar conexión #
- Select the newly created proxy node from the configuration list
- Toque the Start / Connect button (bottom-right circular icon)
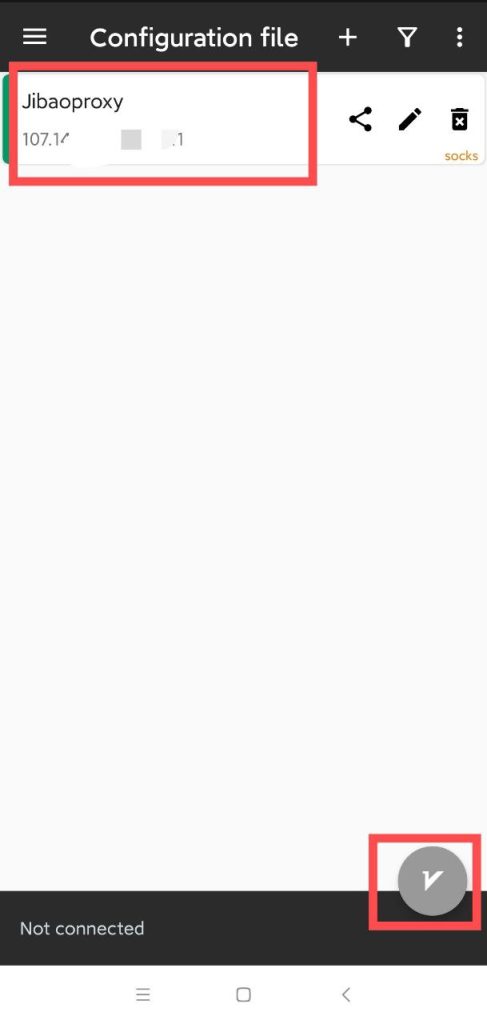
3.When prompted to establish a VPN connection for the first time, tap Allow
Once the status shows “Connected” and the button turns green, the connection is successful.
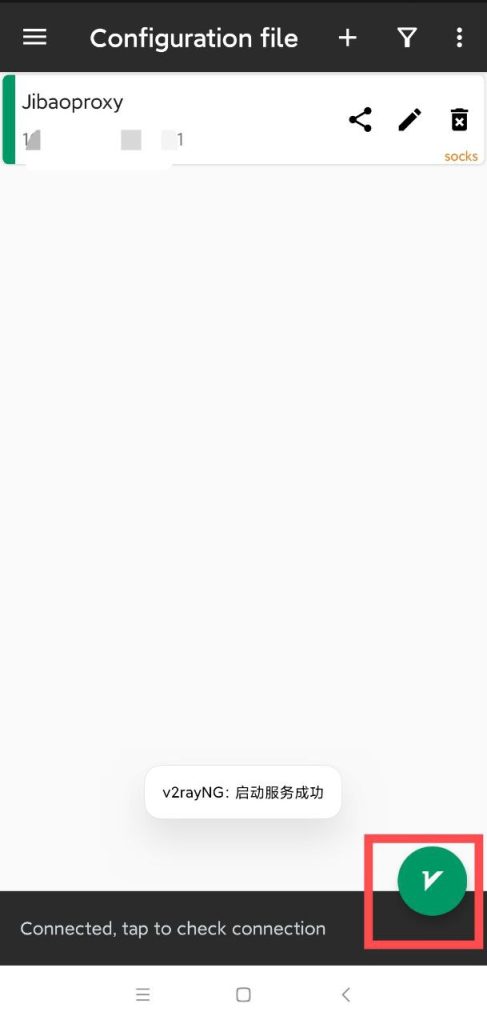
👉 You may visit any overseas website or use an IP-checking service to confirm that your IP address has been successfully switched.
Obtén Tu IP de Proxy #
Antes de configurar, obtén tus credenciales de proxy:
- IP de Proxy Compartido
- IP Móvil
- IP Dinámica de Centro de Datos
- IP Residencial Dinámica
- IP Estática de Centro de Datos
- IP Residencial Estática


