1. Bisitahin ang opisyal na website ng JibaoProxy at magparehistro o mag-log in sa iyong account.
(Ang mga bagong user ay makakatanggap ng 500MB sa pagpaparehistro)
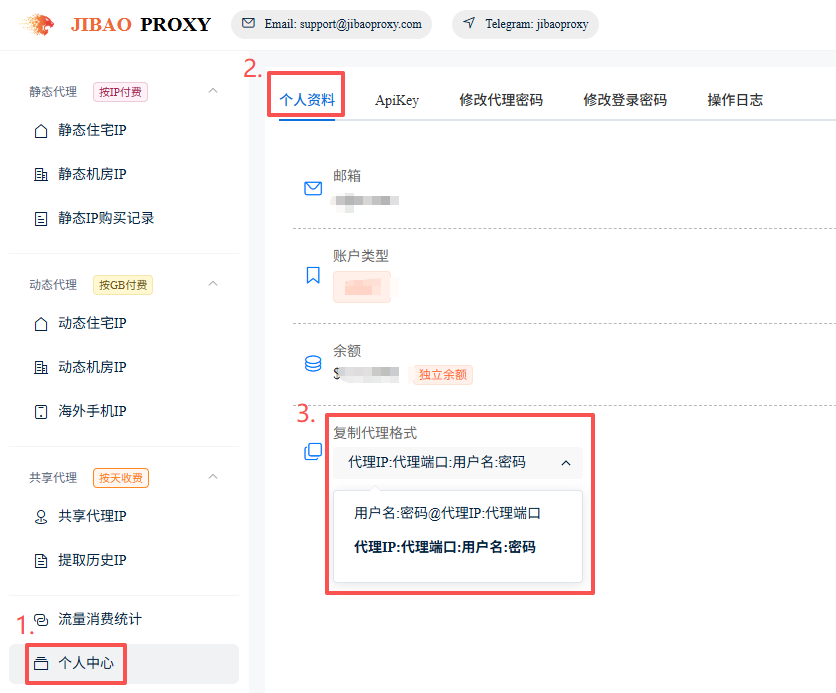
2. Piliin ang proxy format:
Profile → Personal Profile → Copy Proxy Format → Piliin ang kinakailangang format.
Awtomatikong ise-save ng sistema ang iyong pinili.
① Proxy IP:Port:Username:Password
② Username:Password@Proxy IP:Port
3. Piliin ang naaangkop na uri ng proxy.
(Static Residential / Datacenter, Dynamic Residential / Datacenter, Mobile 4G/5G)
4. Kunin ang mga detalye ng proxy IP:
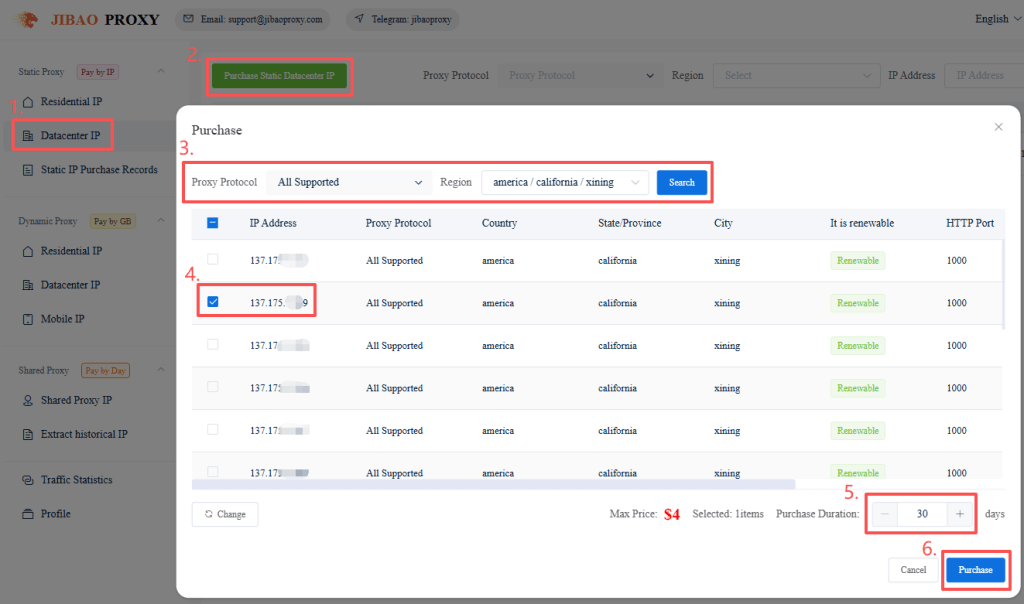
① Static IP (halimbawa ng Datacenter IP):
- I-click ang “Datacenter IP” sa kaliwang sidebar
- I-click ang “Purchase Static Datacenter IP”
- Piliin ang “Proxy Protocol” at “Region”, pagkatapos ay i-click ang “Search”
- Piliin ang “IP(s)” at “tagal ng paggamit”, pagkatapos ay i-click ang “Purchase”
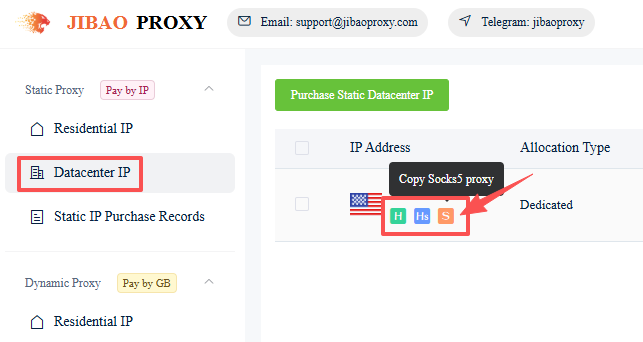
- I-click ang mga icon sa ibaba ng napiling IP upang kopyahin ang mga detalye ng proxy
(HTTP / HTTPS / SOCKS5)
Halimbawa:
137.1**.***.**9:1000:ls*****0:qQ******aq
Proxy IP:Port:Username:Password
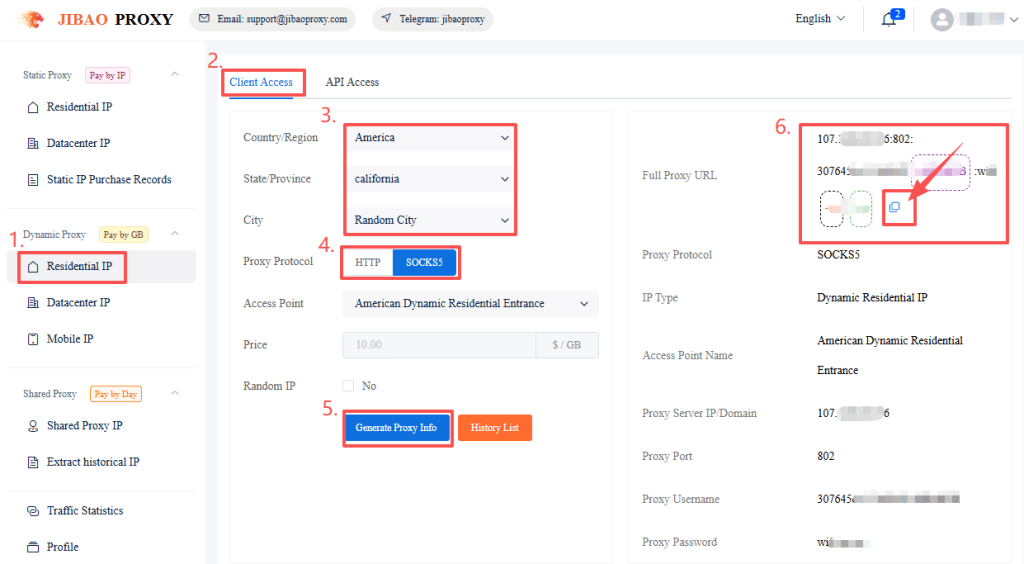
② Dynamic IP (halimbawa ng Residential IP):
- I-click ang “Dynamic Residential IP” sa kaliwang sidebar
- Piliin ang “Client Access”
- Pumili ng rehiyon, proxy protocol, atbp.
- I-click ang “Generate Proxy Info”
- Kopyahin ang mga detalye ng proxy nang direkta o mula sa History List
(Sumusuporta sa HTTP / SOCKS5)
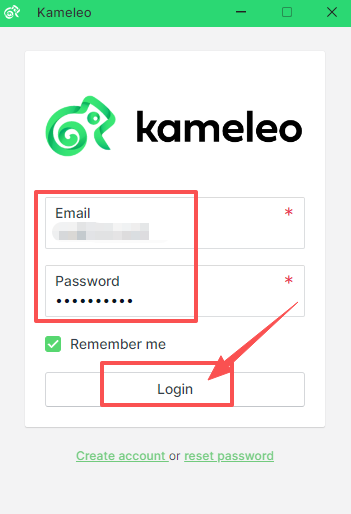
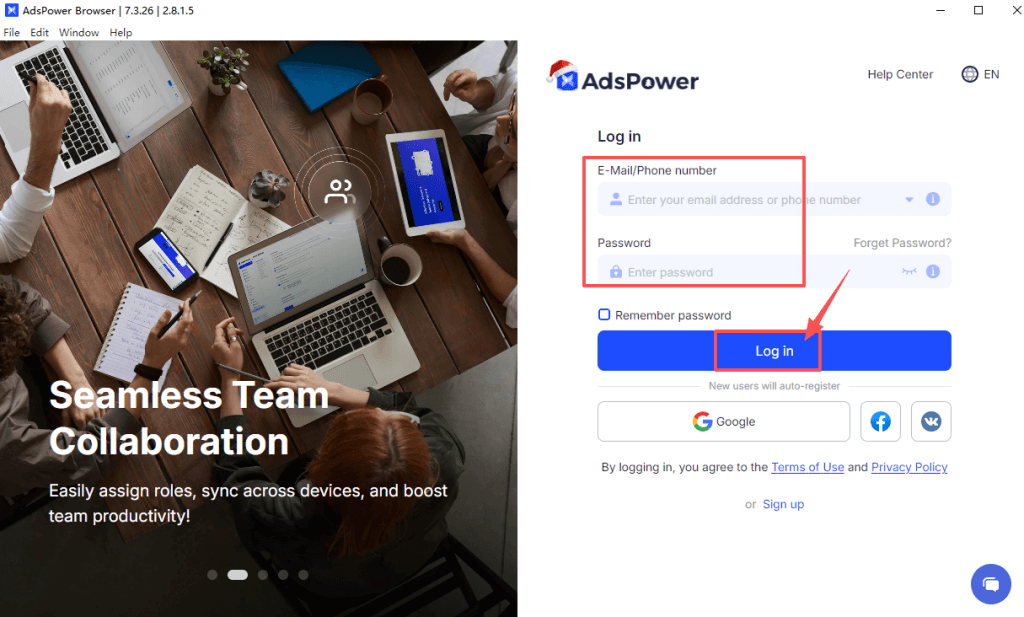
5. I-download at magparehistro sa Adspower, pagkatapos ay mag-log in sa client (2 profiles na libre).
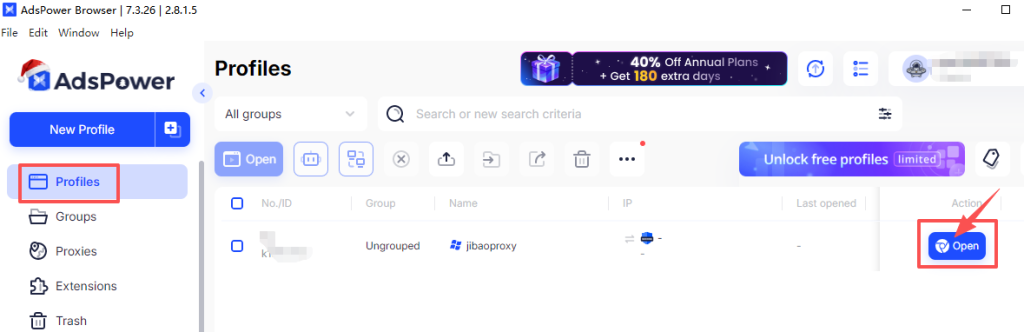
6. Sa kaliwang sidebar, i-click ang “New Profile” → Proxy → Custom → Proxy type → Ilagay ang impormasyon ng JibaoProxy → i-click ang “Check Proxy” → i-click ang “OK” upang i-save ang profile.
7. Sa listahan ng “Profiles”, i-click ang “Open” upang simulang gamitin ang browser.
Get Your Proxy IP First #
Before configuring, get your proxy credentials from JibaoProxy:
- Shared Proxy IP
- Mobile IP
- Dynamic Datacenter IP
- Dynamic Residential IP
- Static Datacenter IP
- Static Residential IP


